January is usually a nice calm month, after the chaos of the holidays. I am usually able to sit back and take some deep breathes and bask in the holiday afterglow. Last January was still a health shit-show, so this month was a breeze in comparison. The month was a little spicier than I would have preferred, but it had plenty of chill. I did a whole lot of knitting. I knit most of one sweater and started another. I have also started to plot a new sewing project. While there are no finished objects, I am very impressed with how much was accomplished this month. I am all lined up for Finish It February to be very successful.
New cast-ons:
- Harris Hood
- The Weekender
Works in progress:
- The Zipper Sweater
- Knitting my memories blanket
Goals for next month:
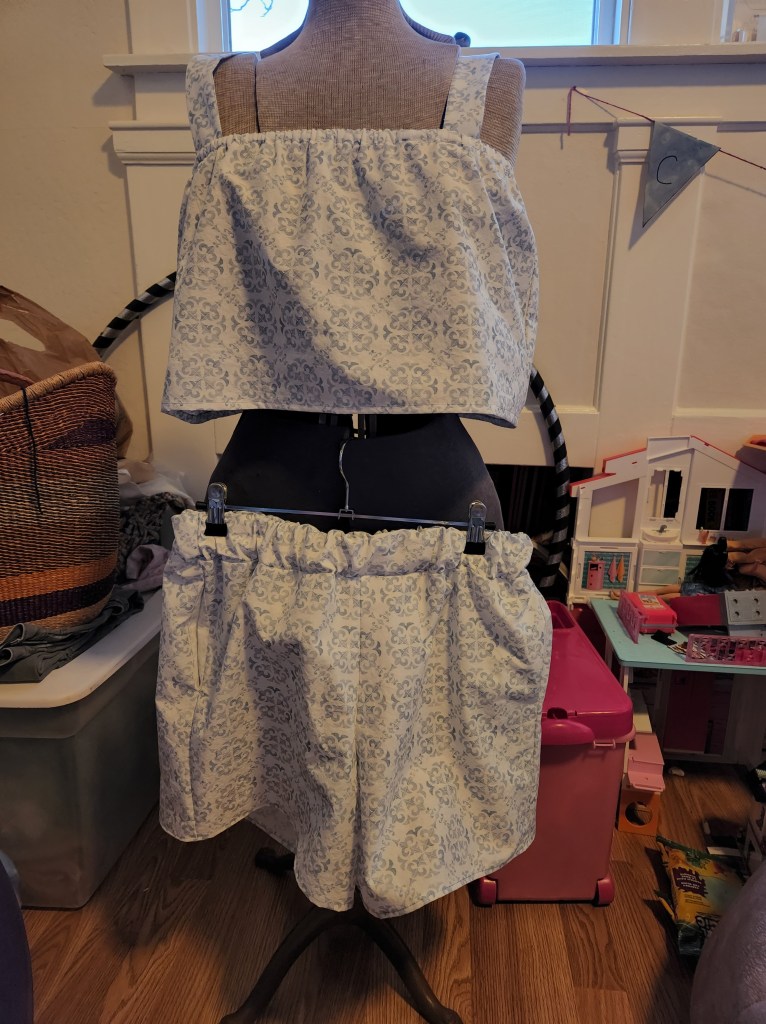
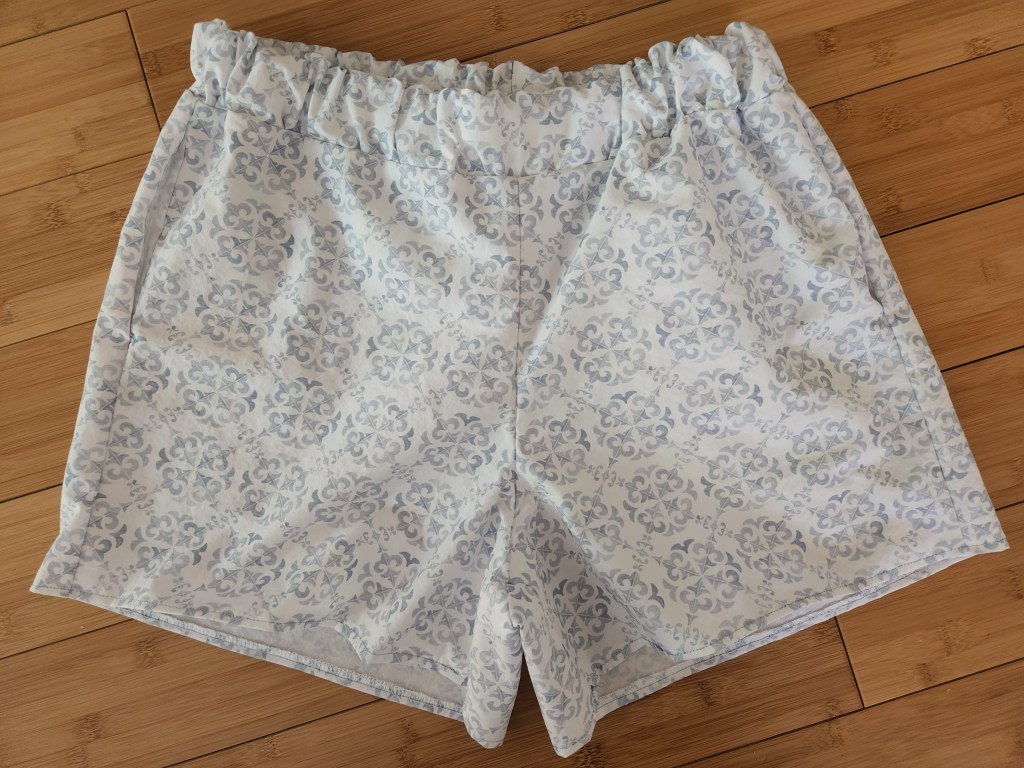
- Make a Sew Over It- Bow Bag
- Knit the bater scarf for Sister #2
- Get lined up for Finish It February
- Slow Sundays
- Knit sample square for blanket re-boot
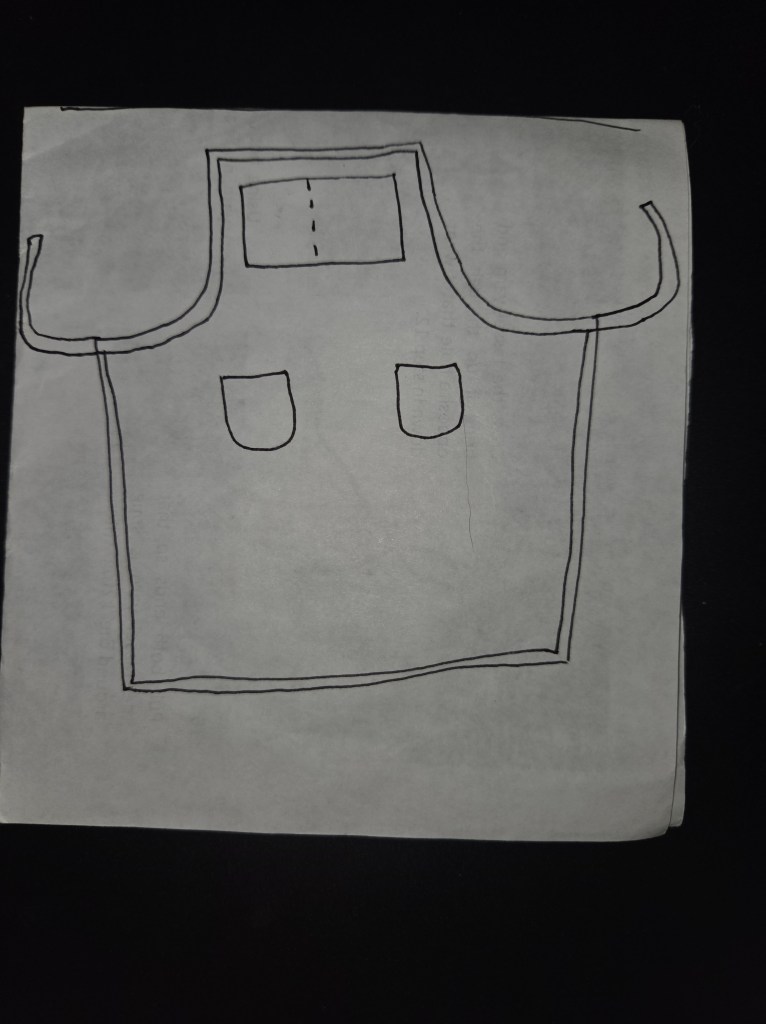
Before I dive into the knitting itself, did you notice that I have a much shorter WIPs list? I made the decision last month to rip out Shatar, so off to the frog pond she went. I didn’t even have that much knit, but I had sat down and made a completion check-sheet, so it was a bit bittersweet. It was time, though. I knew that even if I was ready to start knitting on it again, I wouldn’t really wear it. I am trying to be very intentional with my knitting now. I want to knit things that I love and want to wear. I am no longer knitting random things in order to use up stash, or knitting a ton of plain stockinette sweaters. I want my projects to have purpose, style (per me), and be exactly what I want to wear or gift at the end of it. I cast on the Zipper Sweater at the end of December and knit all of it in January. The only reason that it isn’t listed as a Finished Object is because in true Mrs. Collins fashion, I stalled knitting the facing and sewing in the zipper. Ridiculous! This will count as finishing a sweater’s quantity of yarn and will be 1/5 of my annual goal. I need to hurry up and finish it. Instead of actually finishing the sweater, I cast on a new Weekender Sweater, by Andrea Mowry. I have knit this pattern before and really like both the process and the finished sweater. I had several balls of a fingering weight wool in black, and had picked up four balls of rainbow wool at the craft reuse store that I always go to when I visit the Father. I loved the idea of pairing them together to make a dark rainbow sweater. I started out with a different pattern, but decide that The Weekender would allow the rainbow pattern to stay cohesive. It is bottom up, which isn’t my favorite, but it worked much better than a yoke or raglan for the pattern flow. I will make a separate post about this when it’s done, even though it is a reknit, because I want to try sizing down the pattern to knit one for Feebs. I also cast on the Harris Hood to combat the battle of keeping my head warm while dealing with full bangs. I didn’t meet my goal of sewing something this month, but I am working out a couple of things that I want to work on in the near future. They will not be super complex or fancy sewing projects, but that is totally okay.
If you read December’s post, you already know that we had the O’s here for New Year’s. We had a lovely time with them and rang in the new year together, like always. The following day, Feebs and I went to see the Father and spend some time with him. We played lots of games and had a great dinner. We didn’t get to do our annual mini-golf game due to the rain, but we did have a lovely time. I also got to swing by Sister #2’s house and see her and her newly finished yard. It turned out great. She is an amazing creative, and was kind enough to make me some care instruction tags on her Cricket machine. I attach them to any handmade gift that I give and had run out. She took my incredibly lackluster and basic design and created fabulous new tags. I wish I had her creativity. The rest of the weekend was spent recovering from the “week off.” We were very mellow and relaxed on the Sunday. That week was spent getting back into the swing of things after two weeks off for Feebs, and a week off for me and the Husband. It was a rough transition for all of us, but we made it. That Friday I had dinner with two of my work peeps and it was a really fun time. We had margaritas, Mexican food, and laughter. The week after was pretty busy. We registered Feebs for a Women in Science conference that will take place in March. It seems like a really cool event and she is excited to go. She also had her first Junior High dance, and had a blast. I guess dances aren’t like they were when I went to school. This one had a movie room, craft room, game room, and dance room. That sounds pretty fancy to me. That weekend was the MLK holiday weekend, and having that extra day off was simply delightful. We had a very mellow and relaxed weekend. I could really use more of those! And I cleaned out the bill case, finally (only took two years). The week was short, but packed. There were appointments to attend, the Father was here for golf, and work was really busy. One of my supervisors has taken a promotion and I spent time with him to learn his desk so I can cover it until I hire a replacement. The following week was my infusion appointments. Nothing super spectacular happened, but we did figure out that the Benadryl is starting to burn my veins. So now we have to dilute it and push it in over a longer period of time. Not ideal, but it won’t hurt anything. I really wish I didn’t need it… I also got to see Ms. C. She came down to have dinner with us. I have missed her so much. Her life is pretty full and she has days scheduled, so we have to work around each other’s lives. We promised to get together more often, so we will see each other again in March. Oh! The other exciting thing that happened in January is that the Husband and I made good on our promise, and Feebs is now in skateboarding lessons. She has taken to it really well and is learning very quickly. It makes me very nervous, but it will give her balance, strength, and confidence. Also, she looks freaking adorable doing it.
Now we are moving on to February, but January was really great. I am grateful that everything stayed rather calm. I am grateful that I have self-imposed Slow Sundays and am not scheduled up to the last minute of my weekend. I am grateful that Feebs found something fun to do that she is enjoying. I am grateful that work is getting better. I am grateful for my family and friends and all of the new memories that we are creating. I am continuing to try to stay positive and look for the good in things. I feel like I am in a better place now, and I want to continue that into 2026. We’ll see how next month plays out.
Loves,
M